Top 8 Methods to Verify Patient Insurance
- Updated Date January 17th, 2026
- Eligibility Verification
- Follow
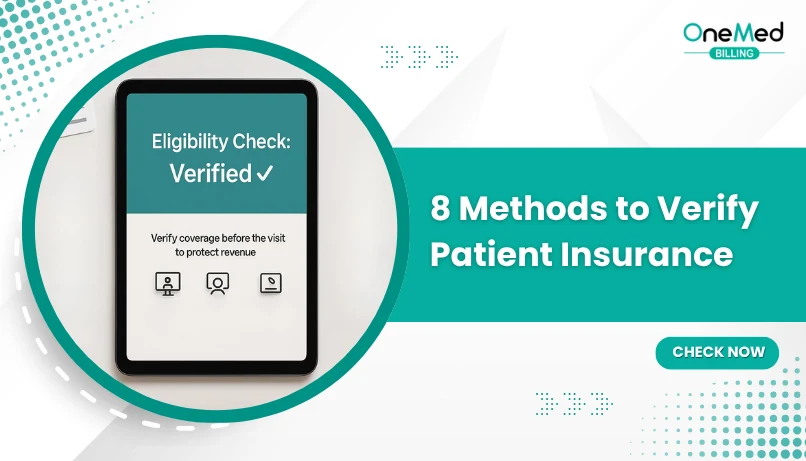
Eligibility verification is the process you run to confirm a patient’s insurance coverage and benefits before services are provided. If you skip or rush this step, you risk claim denials, delayed payments, and frustrated patients who receive unexpected bills. You want to treat eligibility verification as a core part of your front desk and revenue cycle workflow, not an afterthought.
When you perform eligibility verification consistently, you can tell a patient exactly what is covered, what their copay will be, whether an authorization is required, and which services will be denied. That clarity protects your practice and improves patient satisfaction. Throughout this blog, we’ll explain eight practical methods to verify eligibility, show how each method works, and give you concrete tips to integrate them into your daily operations.
What is Eligibility Verification, and What Details Should You Confirm?
At its core, eligibility verification confirms that a patient’s insurance policy is active and establishes the terms of coverage. When you verify eligibility, make sure to capture these core data points:
- Active policy status and effective dates
- Plan type (PPO, HMO, Medicare, Medicaid, etc.)
- Member ID and group number
- Policyholder relationship and birthdate
- Copay, deductible, and coinsurance amounts
- Prior authorization or referral requirements
- In-network versus out-of-network status
- Any service-specific exclusions or limitations
Every time you record eligibility verification, include the date and time, the method used (portal, phone, electronic system), and a reference number or the name of the representative who confirmed coverage. This documentation is your primary defense if a payer later disputes a claim.
Why Eligibility Verification Matters for Your Practice?
When you make eligibility verification a standard part of your workflow, you reduce the number of preventable denials. A single denial due to inactive coverage can cost you the service revenue plus the time spent fixing and appealing the denial. More importantly, patients who understand their coverage are less likely to be surprised by bills, which protects your patient relationships and lowers collections friction.
Think of eligibility verification as a risk-management tool. It helps you:
- Avoid submitting claims to inactive plans
- Collect copays and estimates correctly at check-in
- Identify the need for pre-authorizations before the visit
- Prevent claim rework and appeals
With the right combination of tools and routines, you can make eligibility verification fast, accurate, and auditable.
1. Electronic Verification Systems (real-time eligibility tools)
Electronic verification systems are built into many modern practice management systems and EHRs. Examples include Athenahealth and Cerner. When a patient schedules an appointment or checks in, these systems query the insurer’s database and return real-time eligibility status and benefit details.
How it works:
- You enter the patient’s name, member ID, date of birth, and service date into your EHR or practice management system.
- The system sends a request directly to the insurer’s eligibility service and receives an immediate response with coverage details.
- The EHR stores the response and can flag issues such as inactive coverage or missing authorizations.
Advantages:
- Real-time results let you know coverage status before you deliver services.
- Integration with practice management reduces duplicate data entry and human error.
- It reduces administrative workload and lowers denial risk.
Best practices for using electronic verification systems:
- Enable real-time eligibility checks during scheduling and again 24 to 72 hours before the visit.
- Verify benefits specific to the services you plan to provide, not just policy status.
- Train staff to read and interpret returned benefit fields like copay, deductible remaining, and authorization notes.
Electronic systems are the backbone of an efficient eligibility verification program, but they are not perfect. They may not capture plan carve-outs or service limits, so you might still need a secondary check for complicated cases.
2. Verify Coverage in Payer Portals
Most payers provide a provider portal where you can log in, enter a member ID, and see detailed eligibility and benefit information. Examples include UnitedHealthcare’s provider portal and many state Medicaid portals. Portals usually show copays, deductibles, prior authorization requirements, and sometimes claim status.
How it works:
- Your staff logs into the payer’s portal with a provider account.
- You query by member ID, patient name, and date of birth, and the portal returns coverage details.
- Some portals allow you to request authorizations or view claims and remittances.
Advantages:
- Direct, comprehensive access to the insurance company’s own records.
- Often free for contracted providers who maintain an account.
- Detailed plan rules and authorization workflows are visible in many portals.
Tips when using portals:
- Bookmark the portal URLs for the payers you use most often and maintain login credentials securely.
- Document the portal lookup with a screenshot or a portal reference number when available.
- If a portal indicates that pre-authorization is required, start the authorization process immediately and document the submission.
3. Batch Verification for High-volume Practices
Batch verification lets you submit many eligibility checks at once, typically through your practice management system. Systems like Kareo or Tebra allow you to submit a nightly batch so you can review any issues before the next day’s appointments.
How it works:
- At a scheduled time (usually overnight), you send a file of patient records to a verifier or clearinghouse.
- The system processes the requests during off-peak hours and returns a report showing which patients have active coverage and which have issues.
- Your team reviews exceptions and follows up with patients whose coverage is inactive or unclear.
Advantages:
- Efficient for practices with large daily volumes.
- Saves staff time versus doing individual checks for each patient.
- Helps identify issues well before the appointment, so you can reschedule or collect payment if needed.
Batch verification best practices:
- Run batch checks daily or at least 24 to 48 hours before clinic sessions.
- Assign a staff person to review exception reports and resolve problems the same day.
- Use the batch report to trigger automated patient outreach or internal tasks.
4. When to Call and What to Ask During Verification
Sometimes a phone call to the payer is necessary, especially when plan language is confusing or when you are dealing with an unusual situation. Calling allows you to clarify service-specific coverage, identify carve-outs, and confirm prior authorization processes.
How to call effectively:
- Have the patient’s insurance card in front of you, and verify the member ID, group number, policyholder name, and date of birth.
- Call the provider line shown on the insurance card. Use an internal script so everyone asks the same questions.
- Ask for the representative’s name and a reference number, and record them in the chart.
- Request coverage specifics for the date of service and the exact CPT code or service description you plan to provide.
Simple phone script example you can adapt for your front desk:
Script: "Hello, my name is [Your Name], calling from [Practice Name]. I have a member [Member Name], DOB [MM/DD/YYYY], member ID [####]. I need to confirm eligibility for services on [Date]. Can you confirm active coverage, copay, deductible responsibility, and whether a prior authorization is required for [service or CPT code]?"
What to document after the call:
- Representative name and badge number
- Time and date of the call
- Reference or confirmation number
- Exact language used by the representative regarding coverage
- Advantages of calling:
- Direct clarification for complex or uncommon coverage questions
- Can obtain payer-specific submission instructions, including mailing addresses or electronic payer IDs
5. How Clearinghouses Handle Eligibility and Claims
Clearinghouses like Availity act as intermediaries between you and multiple payers. They handle eligibility checks, claims submission, and often return standardized eligibility responses that are easier to read and store.
How it works:
- You submit an eligibility request to the clearinghouse.
- The clearinghouse forwards the request to the appropriate insurer and aggregates the responses.
- Results are delivered back to you through the clearinghouse portal or integrated back into your practice management system.
Advantages:
- Handle multiple payers with one connection
- Centralized reporting for eligibility checks and claim status
- Often integrates with your practice management or EHR
Best practices with clearinghouses:
- Make sure your clearinghouse is contracted and configured for the payers you use most frequently.
- Use clearinghouse reports to populate your daily verification dashboard.
- Document clearinghouse reference IDs for later appeal support.
6. Handling Eligibility the Manual Way
Not every payer supports electronic methods. For some state Medicaid programs, small regional carriers, or legacy systems, you may need to send a manual verification request via fax, email, or mail. Manual checks are slower but still valid. If you use manual methods, keep everything documented and time-stamped.
How it works:
- You send a verification request to a payer via fax or secure email.
- The payer replies with coverage details via the same channel.
- You attach the payer’s response to the patient’s chart as proof of verification.
Advantages:
- Useful when electronic methods are unavailable
- Provides written documentation that may be useful for appeals
Manual check best practices:
- Use secure fax or secure email to protect PHI.
- Scan and attach payer responses to the patient’s electronic chart immediately.
- Follow up by phone if you don’t get a reply within the expected timeframe.
7. Automated Phone Systems for After-Hours Checks
Many payers offer interactive voice response systems that let you enter member information on a phone keypad and receive an automated eligibility response. IVR systems are convenient when you need a quick check outside regular business hours.
How it works:
- Call the payer’s automated provider line and follow menu prompts.
- Enter the member ID and date of birth using your phone keypad.
- The system provides an immediate readout or sends a text with eligibility details.
Advantages:
- Available 24 hours a day in many cases
- Fast for simple yes or no checks on active coverage
Limitations of IVR:
- Automated systems rarely provide detailed benefit language or plan carve-outs
- You should still document the IVR response and note the date and time
8. Eligibility Checks Through Integrated EHR Systems
Many EHRs like Epic, have eligibility verification integrated into the check-in workflow. Integrated checks happen in real time and update the patient’s chart with coverage details automatically, which reduces manual entry and downstream errors.
How it works:
- At appointment scheduling or check-in, the EHR automatically queries the payer and retrieves eligibility information.
- The EHR flags discrepancies or missing authorizations and can block scheduling if coverage is inactive.
- Verification details are stored in the chart for auditing and future reference.
Advantages:
- Seamless integration with patient records and scheduling
- Real-time updates minimize manual errors
- Reduces friction for staff who don’t need to switch systems
To get the most from integrated EHRs, make sure to configure automatic queries for both scheduling and day-of check-in, and train staff to act on flags immediately.
Steps to Create a Consistent Eligibility Verification Process
Having the right tools is only half the battle. You need standard operating procedures, documentation standards, and staff training to make eligibility verification reliable and repeatable.
A) Create a verification checklist or SOP
Standardize the process so every staff member verifies the same items in the same order. Your SOP should include:
- When to verify (at scheduling, 24 to 72 hours before visit, and at check-in)
- Which fields to capture (member ID, group number, plan type, copay, deductible, authorization requirements)
- What to do with exceptions (inactive coverage, authorization required, unknown payer)
- How to document the verification (method, rep name, reference number, date and time)
B) Document everything and keep auditable records
Good documentation is your best defense when payers later deny a claim. For each verification, capture:
- Method used: portal, electronic system, clearinghouse, phone, fax, or IVR
- Date and time of verification
- Representative name and confirmation or reference number
- Exact coverage details verified (copay, deductible, services covered, authorization needs)
Store this information in a way that is easy to retrieve for appeals or patient billing questions. If you use manual faxes, scan and attach them to the chart immediately.
C) Train your front desk and billing teams
Eligibility verification is a team responsibility. Train staff to:
- Perform consistent checks using the SOP
- Interpret eligibility responses and identify when to escalate complex cases
- Use portals, clearinghouses, and EHR tools confidently
- Collect the correct copay or deposit at check-in or provide an accurate patient estimate
Regular refreshers and role-playing phone call scenarios will keep skills sharp and help prevent mistakes.
Measure performance and set KPIs
Track metrics to measure the effectiveness of your eligibility verification process. Useful KPIs include:
- Percentage of appointments with verified eligibility before the visit
- Denial rate due to eligibility issues
- Time taken to resolve verification exceptions
- Patient balances due to verification errors
Use these numbers to identify weak spots and make continuous improvements.
Troubleshooting common eligibility verification problems
Even with a solid process, you will face occasional problems. Here are common issues and how to address them:
Issue: The payer says the member ID is inactive
- Double-check for typos in the member ID and birthdate.
- Ask the patient to confirm the front and back of their card and update your records.
- If the ID is correct and still inactive, call the payer to ask about effective dates and whether a new ID exists.
Issue: Authorization was not obtained, and the visit is today
- Attempt an immediate phone authorization; some payers provide retroactive authorization in urgent cases.
- Document all calls and confirmations. If you cannot obtain authorization, discuss payment options with the patient and consider rescheduling nonurgent services.
Issue: Eligibility returned, but benefits are unclear
- Use the payer portal or call to request detailed benefit language for the specific CPT code or service.
- When in doubt, document the uncertainty and get patient consent for possible out-of-pocket costs.
Conclusion
Eligibility verification is not optional. It is a vital control that protects revenue, prevents denials, and helps you provide transparent billing information to patients. Use a combination of electronic verification tools, payer portals, clearinghouses, and well-documented phone calls to build a strong eligibility verification program. Standardize processes with SOPs, train your staff, and measure results so you can continuously improve.
When you consistently apply these eight methods and follow best practices, you reduce surprise denials and speed up reimbursement. Eligibility verification is a small investment of time that returns big benefits in fewer appeals, lower patient friction, and more predictable cash flow.
Frequently Asked Questions
Find quick answers to common questions about this topic, explained simply and clearly.
What methods are used to verify patient coverage?
Patient coverage can be verified through payer portals, EDI 270/271 transactions, clearinghouse tools, or by contacting the insurance company directly. Many practices also use integrated EHR or billing software to confirm coverage in real time.
How do I verify the insurance benefits of a patient?
To verify benefits, confirm the patient’s active coverage, deductible, copay, co-insurance, and any prior authorization or referral requirements using payer portals or electronic eligibility tools. Always record confirmation details for billing a
What is the verification process in medical billing?
The process involves collecting patient insurance details, confirming plan validity, checking benefits and coverage limits, identifying pre-auth needs, and updating the verified information in your billing system before submitting claims.
What are the two most important things to verify for a patient?
Always verify that the patient’s insurance coverage is active for the date of service and understand their financial responsibility, including copay, deductible, and co-insurance amounts, to prevent denials and payment delays.

